
Enhance your WordPress site's security by changing the default database table prefix. Follow this step-by-step guide to safely update the prefix and prevent SQL injection attacks.
By default, WordPress uses the wp_ prefix for all its database tables. While this works just fine, it’s also a known pattern—which makes your site more vulnerable to attacks. One of the simplest yet most effective ways to harden your WordPress security is by changing this default table prefix to something unique.
Here’s a step-by-step guide to help you change your WordPress table prefix manually and securely.
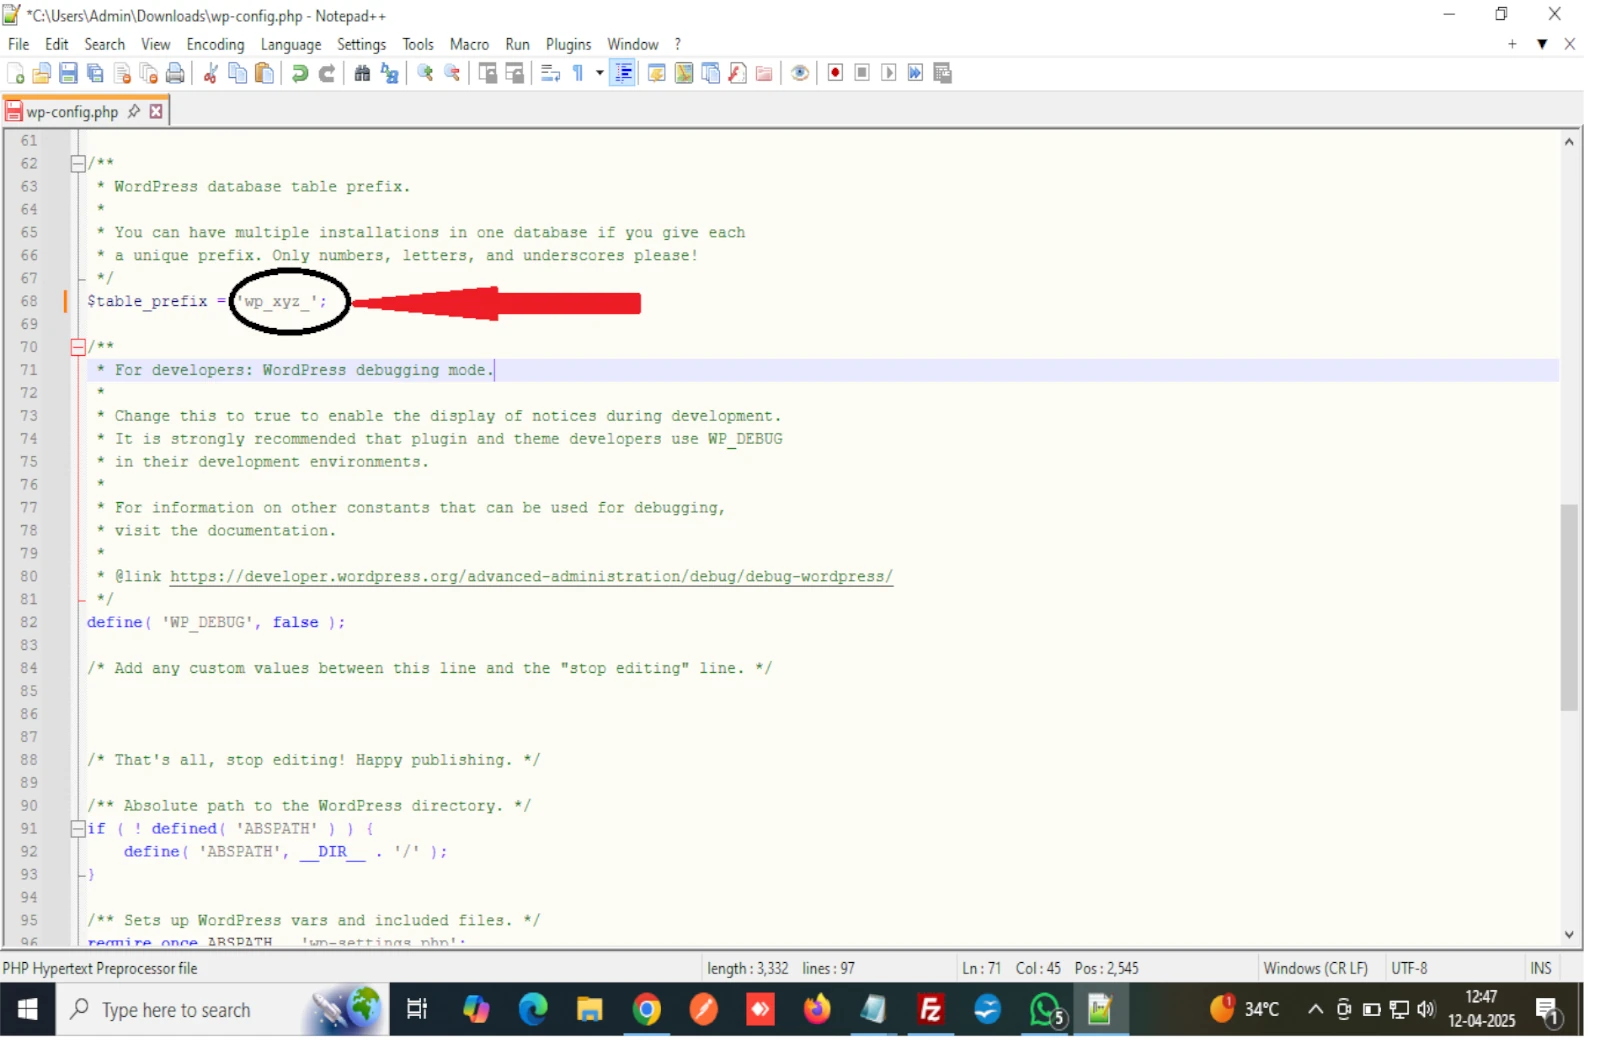
wp-config.phpTo begin, we’ll change the prefix setting in WordPress's configuration file.
wp-config.php file.
Next, we’ll update the actual table names in your database using phpMyAdmin.
wp_.wp_, and in the To field, enter your new prefix, e.g., wp_xyz_.📸 See the screenshot below for reference:

🔄 Step 3: Update Prefixes in Meta and Options Tables
Even after renaming the tables, WordPress still stores some internal references using the old prefix. To complete the migration:
OLDPREFIX and NEWPREFIX with your actual values (e.g., wp_ and wp_xyz_):✅ This ensures WordPress uses your new prefix in all settings and metadata.

🎉 Done!
That’s it! You’ve successfully changed your WordPress table prefix, making your site just a little bit harder for attackers to guess their way in.
Pro Tip: Always take a full backup of your site and database before performing any changes like this.
(1) (0)


No comments